How to set description field in Incidents to auto expand
By default the description filed in Incidents form will only display a maximum of 3 lines of information before you have to scroll down to see the extra content. This is sometimes annoying when there’s a lot to read. In the other hand, if you have noticed, Service Request form does expand automatically as information is added.
I am still finding it ackward that Microsoft didn’t implement the same for Incident form. Incidents are often the Work Items that are created the most in big organizations, and IT Admins want users to add as much info as they can so troubleshooting and fixing can be achieved smoothly.
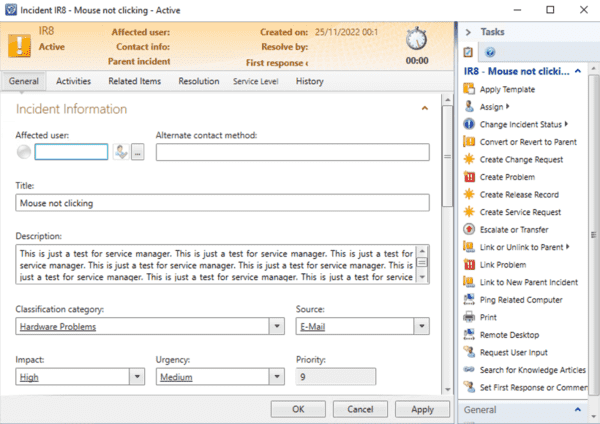
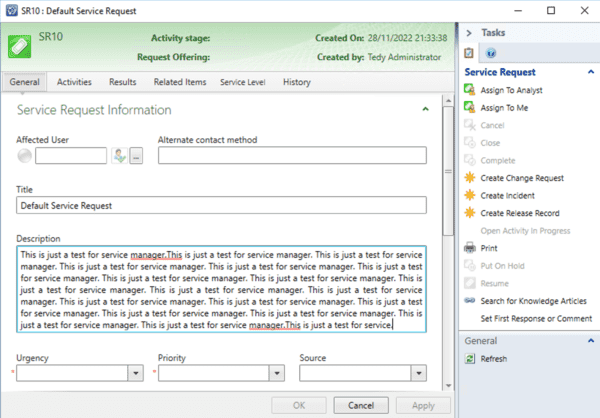
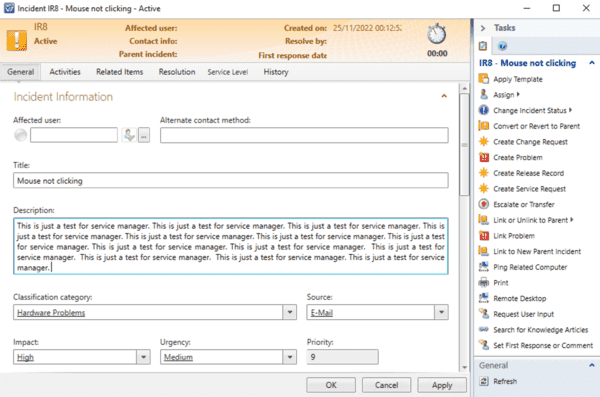
If you see the pictures below you will notice the difference in the description form between Incident and Request, where request is easier to our eyes and displays the information in a more cleaner and easier manner.
Incident form
Service Request form
As you can see description field in Service request form is wider and the more you add the more it expands. This post will guide you on how to achieve the same for Incidents.
Getting started
You will need to install System Center Authoring Tool, which is free. With this tool you can customize your Service Manager’s settings, forms, templates and so on in a more advanced way . You can download it here. I’d advise you to install it on your SCSM server.
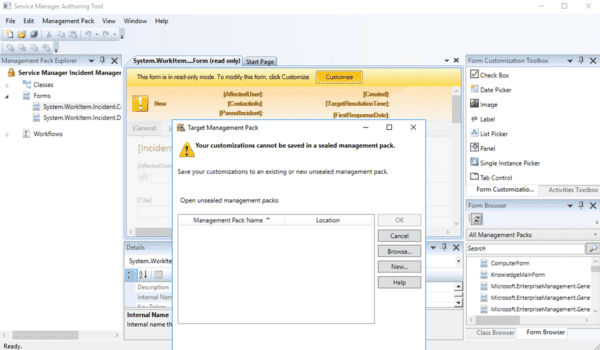
Open your Authoring Tool, go to the very bottom right corner and click Form Browser then click the reload button that looks like 2 green arrows. Type Incident and look for System.Workitem.Incident.ConsoleForm. Right click System.Workitem.Incident.ConsoleForm and click View.
Click Customize set in the box on the top of the form. Because the Management Pack is sealed and can’t be edited, it will ask you to select or create one. We are interested in creating a new one, so select New on the new prompt.
Give it a name and a location where you want to save it then click OK to start editing it.
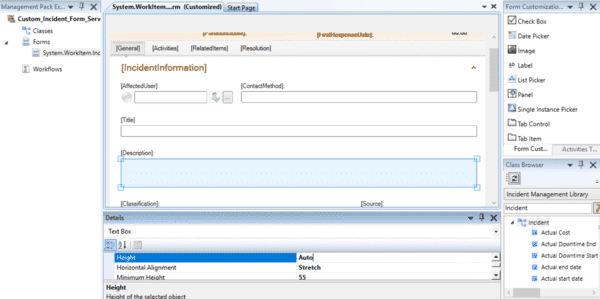
Because we just want to edit description field click in the Description box in your form so it can show its properties in the bottom.
Scroll down until you find Layout, Height. By default it will be set to 55 and we need to change it to Auto. This is all you need to do to change the form to auto expand.
Right click your Management Pack you just created and click Save. Do the same again but choose close. You can also close the one you first opened so you could expand its form to your Management Pack.
Now go to your Service Manager console, Administration, Management Pack and choose Import on the right side pane. Navigate to where you saved your new Management Pack and import it.
Now open one of your Incidents and see the difference.
Voila, you’ve just made your incident form look better and save some of your IT Admins clicks and head bangings. I’d advise you to seal this Managment Pack as SCSM can get a bit annoyed when creating templates from MPs holding these type of changes.
This will do for today and hope having you back for the next post.