Exchange online has been on the rise and companies have been migrating to it and decommisioning their on-premises servers. For some various reasons, you will find businesses stuck to the on-premises version and will have to deal with updates, upgrades and security management.
Exchange on premises is the old goat. It works, it does what you need it to do and it also has it’s hiccups. One of them is security. In most enviroment, you are required to publish Exchange Control Center (ECP) and Outlook Web Access (OWA) and these can bring some security concerns as these portals will become accessible for everyone.
Table of Contents
Before we go any further, let’s understand these 2 Exchange features.
What are ECP and OWA
Exchange Control Panel (ECP)
Is your Exchange Server web-based management portal where you can manager your Exchange Server from inboxes to Databases themselves. This is where your Exchange Administrators can login to access Exchange resources.
Outlook Web Access (OWA)
Is basically a version of Outlook accessible via a browser. A fully featured web based email client that your users can access to use their mailbox and deal with their emails, calendar, etc, on the go.
As you can see, they are both accessible via the web, and if you have them exposed to the internet, it’s likely that it they are all reachable to everyone, even me.
In this post I will guide you on how you can restrict their accesses to specific IPs or range of IPs. This is one of the easiest ways to secure them without bringing any additional tool or third-party software.
Getting started
For this senario We’ll be using an IIS feature called IP and Domain Restrictions. It’s free and you can install it from straight from your Server Manager.
Install IP and Domain Restrictions
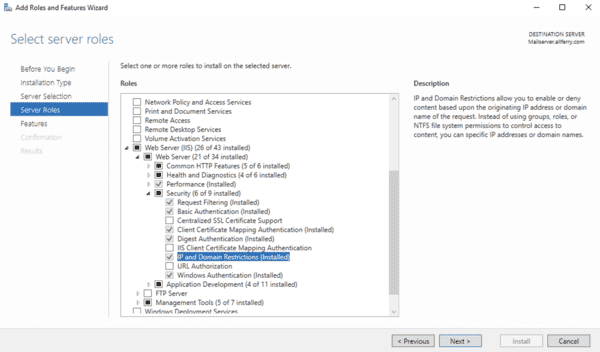
Head over to your Server Manager on your Exchange Server, Dashboard, click Add roles and features. Click Next on Before Your Begin, click Next again on Installation Type, select your Exchange Server and click Next. Once in Server Roles, expand Web Server (IIS), Web Server, Security and tick IP and Domain Restrictions, click Next and click Install.
You will get a notification once installation completes. We now need to configure it so you can start securing your ECP and/or OWA access.
Configure IP and Domain Restrictions
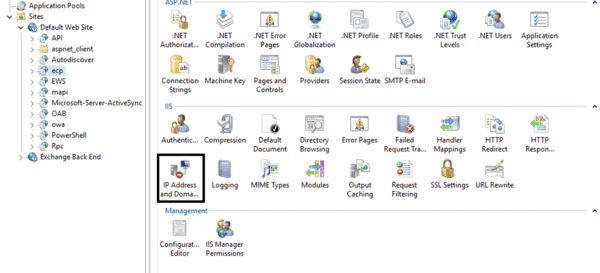
Open your Internet Informartion Service (IIS) by just searching for IIS in your Start menu. Once IIS opens, go to left menu list, expand the arrow on your server name, expand Sites, Default Web Site, select ecp or owa and double click IP Address and Domain Restrictions to open.
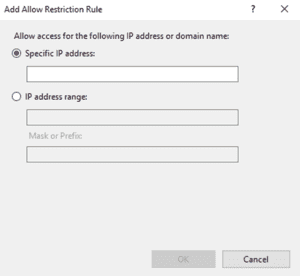
You now have options to Add Allow or Deny entries. Here you can start adding IPs or IP ranges by clicking Add Allow Entry as image below shows. Pick one and add the data in.
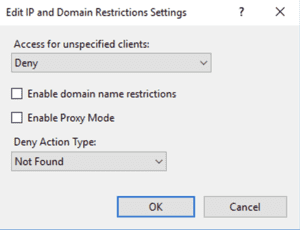
After you’ve added the allowed ones, you will need to set deny all other IPs that are not in the allow list. You can achieve this by click on Edit Feature Settings and set Access for unspecified clients to Deny and Deny Action Type to Unauthorized.
Repeat the same for both ECP or OWA as the process is the same.
Final note
Important to note that if you are using OWA for your users to reset their passwords, and have locked ECP with these steps, your users will not be able to reset their password anymore as OWA calls for some ECP subdirectories when users reach password reset page.
This is all you need to do to accomplish the topic in this post. As always, let me know how you get on and come back for more info should you ever need.
0 Comments
Bravo
Articolo scritto chiaramente e blog veramente pulito
Continua così


Bravo
Articolo scritto chiaramente e blog veramente pulito
Continua così