Today is the big day: the beginning of a long long fun with System Center Service Manager…and dare I say that!
For the ones not familiar with Service Manager, its one of Microsoft System Center suite add-ons, which helps businesses provide services, knowledge base and ticket system to their end users.
The use case for Service Manager is vast but let’s just keep the above in mind for this post.
To start with the installation we will need to check what is required so Service Manager can be installed successfully. The requirements that follow are for Service Manager 2016.
I will try my best to provide the links to files or prerequisites you need to complete the installation, but some might not be available by the time you read this post. Some can actually be found in SCSM folder, once you extract the files from your ISO image.
Table of Contents
Getting started
Domain Environment
Service Manager relies mostly on Active Directory for users and devices, so at this point you should already know and have your Active Directory setup. User Accounts and groups – You will need to create at least 2 domain accounts: 1 for Service Manager to run under, 1 for Worflow. For this blog mines are SCService and SCWorkflow (enabled email for workflow account if you want SCSM to send email notification). They will then need to be added into Local Administrators group in the server where you will be installating Service Manager. Also create a security group that will be used to give your SCSM Admins access to SCSM Server, so add your Admins into the group once created. Mine will be SCSM_Admins.
Windows Server 2016
Its the current supported OS version. People have reported to work in 2019 OS too but will follow Microsoft guidelines.
Microsoft SQL Server 2014/2016
This is where Service Manager will rely the most for its work items and saving files. The SQL Server installer normally comes with your SC installation, so please use that.
SQL Server 2014 Analysis Management Objects
Another requirement that Service Manager needs or it wont let you go through the installation. Download it here, choose SQL_AS_AMO.msi size 4.1 MB.
Microsoft Report Viewer Redistributable 2008
Another requirement that Service Manager will complain about. Download it here
.Net Framework 3.5
You can install this from your your Server Manager, or just download it and installed from the link. Download it here
Installation
Windows Server 2016
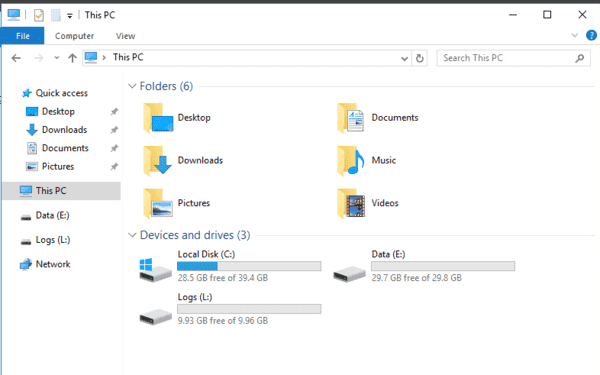
We will skip the Server deployment but worth mentioning that my server is configured with 2 vCPU, 6GB RAM and 3 discs: 1 “C” drive for system, 1 “E” drive for SQL Database files, 1 “L” for Database logs. I like to isolate them so this way you can easilly move eg. your Database drive to an SSD disk without worrying about the log files moving too.
Now add the 2 account you created into Local Administrators group, if you haven’t done it yet. In your Server that will host Service Manager, right click on your Start Menu, choose Computer Management, expand Local Users and Groups, go to Groups, double click Administrators and click add to add your accounts.
To save you from some issues in the future, I’d advise you to give these account rights to Log on as a service in tha server too.
SQL Server 2016
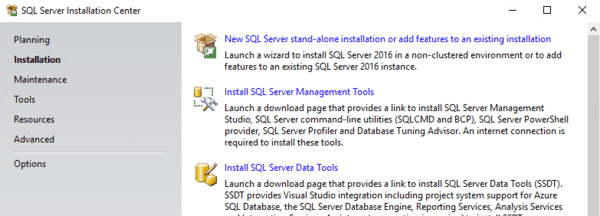
Mount your SQL ISO and run the executable. on the left side, click Installation, then go to the options and choose New SQL Server stand-alone installation or add features to an existing instllation.
Accept the license terms by ticking the box and click Next. Installation will check for updates you can then click Next again. You might see the warning below but its fine. you just need to open port 1433 for other applications to communicate with this SQL Server, but as installation is local Service Manager won’t bother.
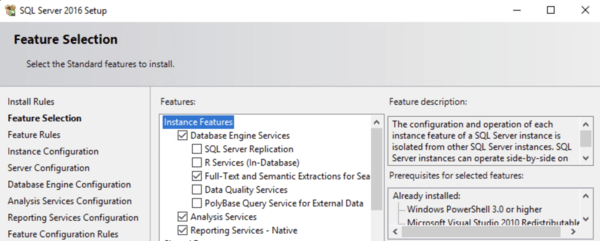
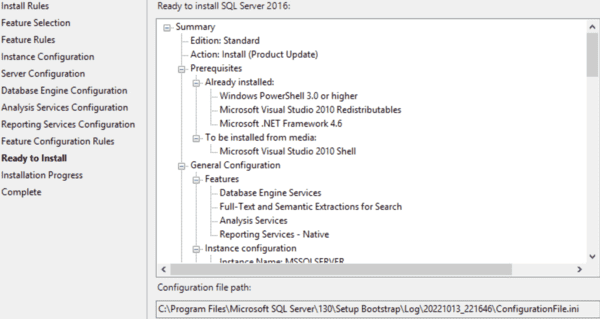
Ins the feature page select Database Engine Services, Full-Text and Semantic Extraction…, Analysis Services and Reporting Services – Native
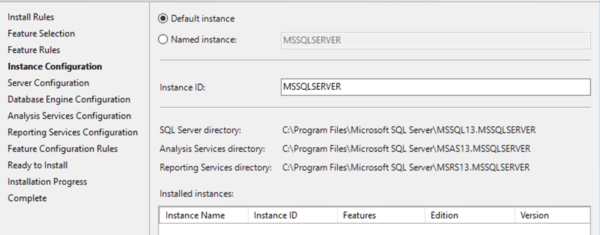
In Instance Configuration leave it ticked to Default instance and Instance ID as default to MSSQLSERVER. This way is easier to connect to your SQL Server Instance without the need to know the instance and database name from the top of you head. The default name is automatically picked by SSMS, SCSM and others.
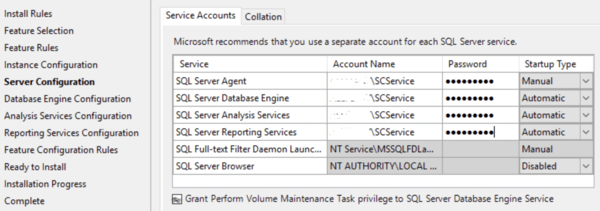
In Server Configuration, setup your account that will run Service Manager, mine is SCService. This will need to be set on SQL Server Agent, Database Engine, Analysis Service and Reporting Services. I have erased my domain name for security purposes but yours will show before the “\”. Then tick Grant Peform Volume Maintenance Task Privileges.
Service Manager Supports 2 collation types (Latin1_General_100_CI_AS and SQL_Latin1_General_CP1_CI_AS) as per some sources. I’d recommend you use Latin1_General_100_CI_ASor SCSM will complain, but still work if you choose SQL_Latin1…. For me, I am happy with SQL_Latin1_General_CP1_CI_AS for Databse and Latin1_General_100_CI_AS for Analysis Services. Click Next
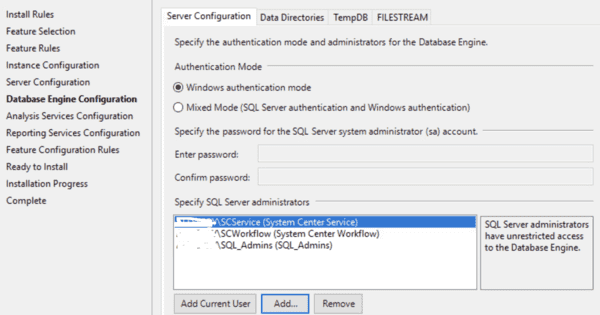
Add the 2 accounts you created for Service Manager in Specify SQL Server administrators, in Server Configuration tab. I like to add a SQL Admin group too in case we, Admins, need to manager the database in the future.
Then go to Data Directories tab to setup your directories. These are where you want your SQL Server to save its Databases, Logs and backups.
In TempDB tab, remove the directory in Data directories and add yours in there, mine is the same as above “E:\SQL Data”. Click Next
In Analysis Services Configuration, select Multidimentional and Data Mining Mode, and add the same accounts and group you added previous step.
In Reporting Services Configuration, leave it as Install and configure, then click Next.
You will now be presented with an overview of your Server configuration. If you are happy with it, just click Install. Take a moment to confirm everything or you will need to reinstall SQL Server if anything goes wrong.
SQL Server 2014 Analysis Management Object
Once you downloaded the file in the link provided above, just run the installer and complete it. Its straight forward and i wont include screenshots for it.
Microsoft Report Viewer Redistributable 2008
This is another quick and easy installation. Complete it and close the installer. Link was also provided above.
.Net Framework 3.5
.Net Framware is basically bread and butter for Windows based apps as their are based on it to run correctly. If you downloaded the file above, just run it and complete the installation, easy one too, so i won’t add any screenshots for it either.
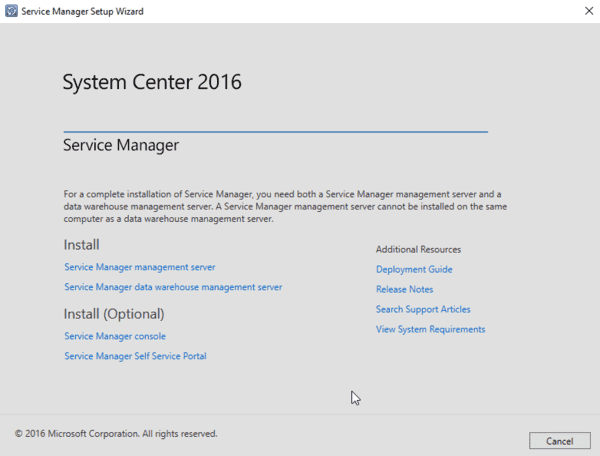
Service Manager
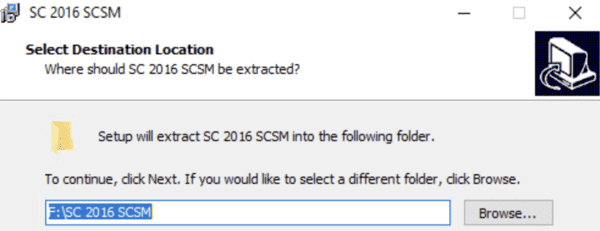
And now to the main installation, System Center Service Manager. Mount your SC ISO, go to the directory and run the file called SC2016_SCSM. This will ask you to accept the agreement, click Next.
You will then need to choose where you want to save the new files that will be extracted, they are not big in size.
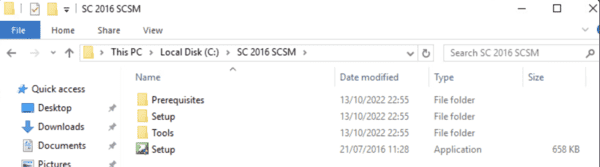
You will now have these files as show below. These are the files you need to install SCSM.
Time to run the installer. Notice that you have a folder called Prerequisites that have some of the files I provided you links to download. These can sometimes be out of date, so better download them new.
Click Install
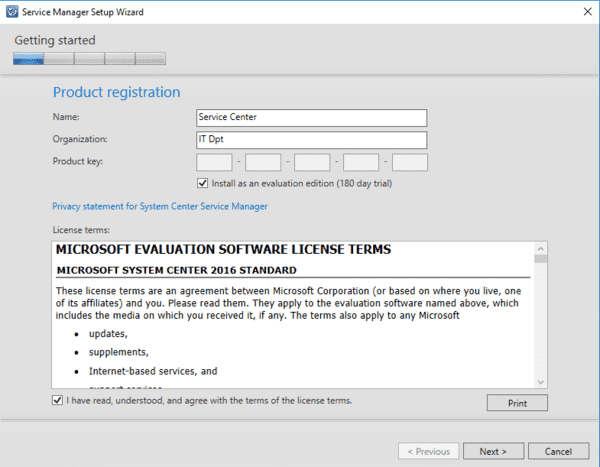
In Product Registration, type a Name, Organization and Product key if you have one. Leave the key empty and tick Install as an evaluation editon if you want to test it only.
Tick I have read, understood, and agree with the terms of the license terms. I am sure you didn’t read it but hey, I didn’t either. Click Next
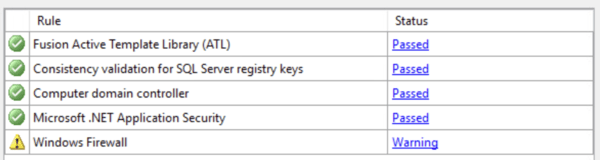
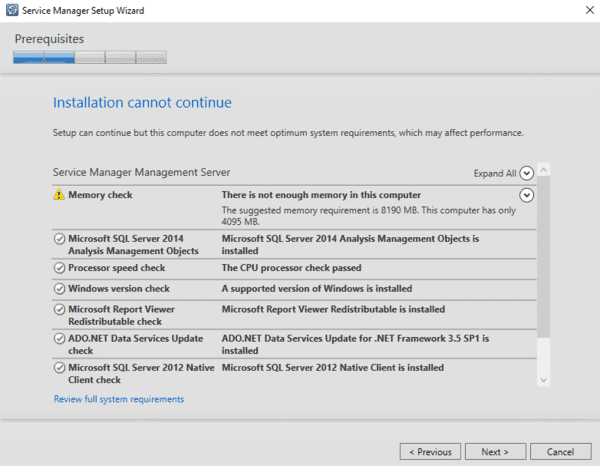
Leave the default Installation location as is. Click Next. SC installation will confirm if you have all prerequisites installed and ready. The yellow sign on mine is just my RAM is lower than what it wants but it will be fine.
You might get the message below regarding the Collation version, but Collation is actually supported. You can close the message and carry on.
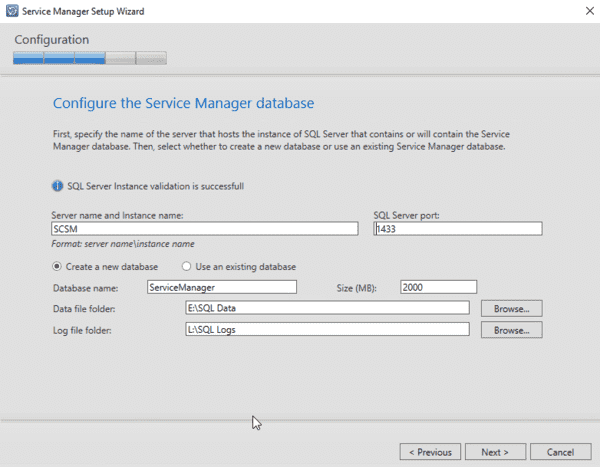
In Configure the Service Manager database, type your Server name that has the Database you will be using, mine is in the same server as SCSM, so name is SCSM, press tab button on your keyboard and the rest of the configuration will be auto populate. These all come from your SQL Server you had previously installed. You can increase the size of your Database if you want.
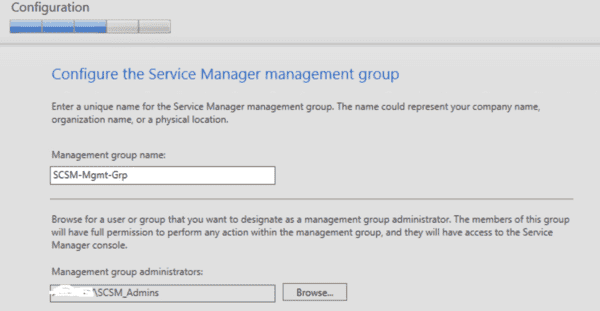
Create a group name for the Management. Can be anything but needs to be unique in case you have multiple management groups in your inveronment.
For Management group administrators, click Browser and type your Active Directory admin group you have created ealier (mentioned in Domain Environment).
In Configure the account for Service Manager services, add your SCSM account you created earlier. Mine was SCService. Type its password, choose your domain and test credentials to confirm they’re correct. Click Next.
Same will be done in the next step for Workflow, in Configure the Service Manager worflow account. Type its password, choose your domain and test credentials to confirm they’re correct. Click Next, and Next again on Diagnostic and usage data.
Choose Use Microsoft Update when I check for upates, in Use Microsoft Upate to help keep your computer secure and up-to-date. Tick Initiate machine wide Automatic Update.
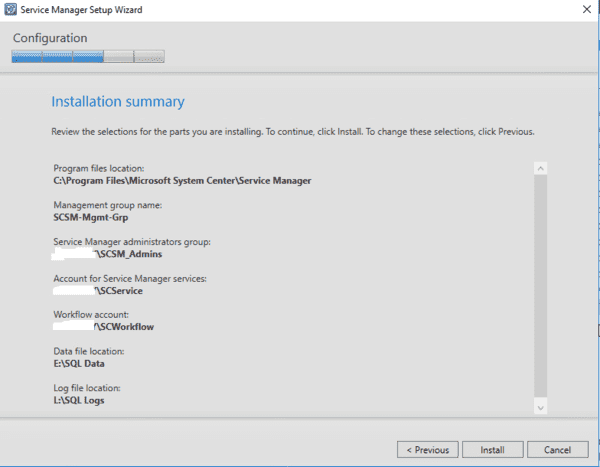
Click Next and you will be provided with an overview of the settings you defined ealier. Click Install to start the installation.
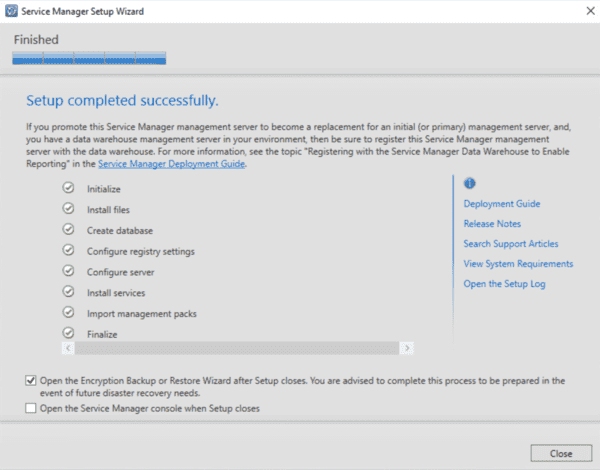
The installation will take a few minutes so I’d advise you to grab and cuppa, or scroll on your Facebook page while waiting. Once completed you will see all the installation steps with green check marks.
If you ticked Open Encyption Backup or Restore Wizard, you will be provided with the file name and a password to save in case you need in in the future.
This completes the installation of System Center Service Manager 2016. Next will be configuring SCSM within the console. You can now start using it by going to your Start Menu and search for Service Manager.